Thursday, December 20, 2012

Thankful Thursday:
"...to keep them interested in things."

"I have long felt that the way to keep children out of trouble 
is to keep them interested in things."
-Walt Disney, 1963


This week I am thankful that we are in Houston and will be spending the day at the Children's Museum of Houston (while AC works, of course).  This is apparently supposed to be one of the best children's museums in the country, and is on my top ten list of museums to take SC to in the next year.  

We knew a few weeks ago that AC would have to make this one-day trip to Houston for work, but this week he said "why don't you just come with me?"  I knew immediately I wanted to go (to spend that extra time with him, of course - it is four hours to Houston from our home), and am thankful that he loves to spend these moments with us as well.  SC and I have gotten very good at traveling along with AC for work, be it a road trip or one out of the country, and enjoy exploring new places on our own and finding interesting things to do while he works.

What last minute trip would you enjoy taking?  Leave a comment, then check out other Thankful Thursday posts here:

Thankful Thursdays Button

Loved and Lovely

Tuesday, December 18, 2012

Top Ten Tuesday:
"Cookies are made of butter and love."

"Cookies are made of butter and love." 
Norwegian Proverb

With Christmas fast approaching, I am going focus on ten dessert recipes that I would love to make in the next week (though I may actually only get to one or two).  These recipes are all going to be paleo, because that is how we are trying very hard to eat (though it is so easy to get stuck in the fast-food rut when AC is out of town), but they all look delicious!  Here they are, in no particular order, with links to the recipes and pictures from the creators' websites:

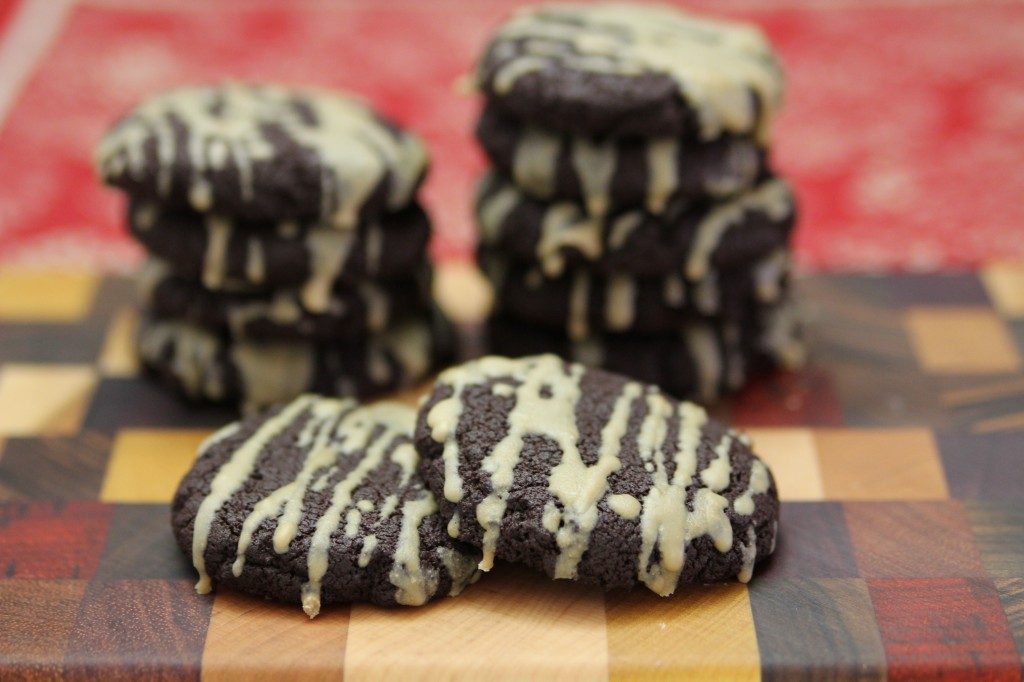
1. Chocolate Shortbread Cookies (with white chocolate icing)


9. Pumpkin Spice Cookies (with vanilla & cinnamon icing)


For the record, I have made the Chocolate Chip Cookies at number eight and they are delicious - very close to "the real thing."  

What goodies are you going to be making this week for Christmas?  Share with us in the comments, then check out other Top Ten Tuesday posts here:

Top Ten Tuesday at Many Little Blessings


**I have not been asked to review or promote any of these recipes, or the blogs or websites I got them from, nor am I being compensated in any way for linking to them from P2P::W.  I have made recipes from the ones I link to in the past (with great results), so I am not fearful to recommend these I have yet to try.

Saturday, December 8, 2012

Advent Day 3-7:
"And behold,
you will conceive in your womb
and bear a son ..."

"And behold, you will conceive in your womb and bear a son, 
and you shall name Him Jesus.  
He will be great and will be called the Son of the Most High; 
and the Lord God will give Him the throne of His father David; 
and He will reign over the house of Jacob forever, 
and His kingdom will have no end."
Luke 1: 31-33

DAY 3: Zechariah

For Day 3, we first started reading from Luke, and learned about the angel Gabriel visiting Zechariah to tell him that his wife Elizabeth would conceive a son (John), even though she is older.  We talked about how God usually gives babies to parents who are young enough to take care of the baby until he or she is an adult and can take care of him or herself, but that Elizabeth and Zechariah had not yet been given a baby, and because they were past this age, they assumed that they would not be blessed with a child.  Then, when Gabriel told Zechariah that Elizabeth would be given a baby, Zechariah did not believe it, and as a consequence of doubting God, Zechariah was rendered mute until the baby was born.

We made a Zechariah ornament, and SC put a big red "x" over his mouth to remind us that all things are possible with God, and we should not doubt Him as Zechariah did.  


DAY 4: Gabriel

On Day 4, we continued reading in Luke and learned about the angel Gabriel visiting Mary and telling her that she would conceive a baby, who would be named Jesus, and would become the savior of the world.

For our craft, we created an angel ornament, with a glitter bell, shiny wrapping paper, and sparkly pipe cleaners.


DAY 5: Mary

Day 5 was a continuation of the reading in Luke from Day 4, and this time we focused on Mary instead of Gabriel.  Mary did not doubt Gabriel's message, but she did ask how, if she were a virgin, she could have a baby.  Gabriel told her that her virginity would be a sign that Jesus is the Son of God.  I really wasn't sure how to explain the virginity issue to SC without giving her more details than she needs right now, but this is a huge part of the story, so we talked about how most people are married before God gives them a baby, and because Mary was not yet married to Joseph, she was unsure as to how God could give her a baby.  How have you handled this with younger children?

We made a Mary ornament, and dressed her in traditional Christmas colors.


DAY 6: Mary/Elizabeth

On Day 6, we read from Luke about Mary going to visit her cousin Elizabeth, and how the baby in Elizabeth's tummy (John) leapt for joy when Mary entered the room, making both women realize that neither of their pregnancies were anything typical.  SC and I talked about how babies inside their mothers' stomachs will react to things that are going on, like loud music, talking, and other things, but in this case, John was reacting to Jesus, who was inside Mary's stomach, which was special.  We also talked about how SC was very active when she was inside of me.

Our craft was to paint paper dolls of Mary and Elizabeth, including their round "bumps" (which SC painted dark black after mixing too many colors together).


DAY 7: Song

Day 7 was focused on the song Mary sang in joy and wonder after her encouraging experience with Elizabeth.  SC and I talked about how the words in many of the songs we sing are to praise God and His greatness, and to thank Him for the blessings He has bestowed upon us.  Then we listened to a few worshipful Christmas songs while we made a music-inspired ornament.


Don't forget, we are using Truth in the Tinsel to guide us through Advent this year.  So far, I would highly recommend it.


What Advent activities have you been up to so far in December?  Leave a comment and let me know!


**I am not an affiliate of Truth in the Tinsel, nor have I been asked to review it.  I am not being compensated in any way for using this product, including, but not limited to, receiving a free copy for review purposes.  Please read my disclosure statement to learn more about my affiliations.

Thursday, December 6, 2012

Thankful Thursday:
"Presents are made for the pleasure ..."

"Presents are made for the pleasure of who gives them, 
not the merits of who receives them."
-Carlos Ruiz ZafónThe Shadow of the Wind


Today I am thankful that I have all my Christmas shopping done, and there are still eighteen days, sixteen hours left until we celebrate.  I do still have a few gifts in transit, but I do not have anything left to buy.  

Now the difficulty will be to resist the rest of the sales that are happening and not buying anything more.  I love giving gifts to SC and AC, and have a hard time seeing things that they would like and not just getting them.  We really wanted to cut down on what we were buying for ourselves this year, because the past four years have been beyond ridiculous when it comes to present-opening time.  We tried to just keep it simple, but I think next year we are going to try something like "need/want/read/wear" because it will be even better to have that specific focus.  We still overbought this year, in my opinion, for ourselves, and I think it was because our guideline was "maybe one bigger gift, and then stocking stuff."  There is quite a bit that has counted as "stocking stuff," though I am pleased we definitely did better than in years past.  

The point of cutting down the quantity of Christmas gifts for ourselves was so that we could be good stewards of the blessings God has given us, and to give to those who otherwise would have nothing.  So, this year we adopted three angels (one whole family) from the Salvation Army Angel Tree program.  The reason we chose this program is because not only is it local, but instead of just collecting toys, it gives both a "need" and a "want" for each child,  as well as lists clothing and shoe sizes for each child and permits the gifting of things not on the list, like socks, underwear, jackets and other items they might need, but are not their number one need.  I would really encourage those of you who are looking for a way to bless others to look for the Salvation Army Angel Tree program local to your home.

What are you thankful for today?  Leave a comment, then check out 

Thankful Thursdays Button

Loved and Lovely

Tuesday, December 4, 2012

Top Ten Tuesday:
"Home is home, though it be never so homely."

"Home is home, though it be never so homely."
English proverb, 
reported by John Clarke, 
Paræmiologia (1639), p. 101.

Over the Thanksgiving holiday, we took the opportunity to use our days off (and AC actually being in town for the whole holiday) to work on creating a backsplash in our kitchen.  


Our house has an open kitchen and living room design that separates the two areas with a long bar-height countertop, which holds the sink, dishwasher and empty counter space on the kitchen side.  The space between the bar-height counter and the sink-height counter is covered completely with the same laminate that is the counter, which is great for the wet area of the kitchen.  However, perpendicular to this area, up against the outer wall of the kitchen is the rest of the countertop and the stove, and unfortunately, between this counter and the cabinets above is just plain wall, and after years of cooking (and splashing) on the stove, we decided we needed create a tile backsplash.

So, here are ten steps to create a tile backsplash.

1.  First, measure the area you wish to tile.  While you are doing this, decide what size tile would look best in the space and might be easiest to place.  Typically backsplashes are done with smaller, more decorative tiles, but plain subway tiles are very popular, and if you are crafty, you can even use both plain tiles and add a strip of decorative tiles strategically (though that may require more cutting).  The area we had to tile was just under eight feet long and between one and two feet in height, depending which part of the counter it was under, so we decided a smaller tile would probably look best.


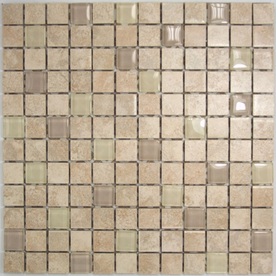
2.  Choose a tile.  We found this tile at our local home improvement store after looking both online and at other stores.  The color of the stone tile matches our countertop perfectly, and the glass tiles add just a little something without being too much in the small space.

3.  Gather your supplies.  
  • You will, of course, need the tile you chose.  Make sure you buy enough extra for cutting and piecing whatever pattern you want.  For example, the tile we chose has an "random" pattern with the glass tiles, so we needed to make sure we had enough to repeat that pattern depending on what we were cutting to fit at the top or the bottom.  For our just under ten total square feet, we bought twelve square feet of tile, which came in 12" x 12" blocks attached at the back with some sort of netting.
  • Some type of tile adhesive like Tile & Ceramic Adhesive
  • Grout in a color that matches the tile you chose.  You can use either the powder that you mix yourself like Polyblend Sanded Tile Grout or a premixed grout like Simple Premium Grout.  We used the premixed simply because we were doing such a small area of it, but we have read online that the powder is really very simple.
  • Caulking that matches the grout color like Polyblend Ceramic Tile Caulk - 10.5 Oz
  • A grout float like Grout Float
  • Tile trowel like 11-Inch by 4-1/2-Inch Notched Trowel
  • Grout sponge like Extra Large Hydra Tile Grout Sponge
  • Water
  • Clean, dry cloth
  • Tile nipper like Compound Tile Nippers (PRO)
  • Tile spacers like 1/8-Inch Tile Spacers, 200/Bag.  Make sure you get the size that you want to space your tile.  If you chose a tile like we did that already has space between the 12" x 12" sheets, make sure you get the same size spacers for between the sheets as is between the tiles on the sheet.
  • If you need to make large cuts, you will need a wet saw like SKIL 3540-02 4.2-Amp 7-Inch Wet Tile Saw.  However, for our tiny tile, AC said it was more likely that he loose a finger than cut the tile in the right place, so we only used the tile nippers for the few tiles we needed to cut down.

**At this point, if your walls are uneven, you may need to take an extra step or two to clean them up.  However, we did not have to do any of that, nor did we sand the wall to remove paint or have anything previously stuck to the wall that needed to be removed or holes patched.  You will need to remove outlet covers if there are outlets on the wall you wish to tile, and add outlet extenders like Quick Fix Electrical Spacers to the depth that the new tile will protrude from the wall.  You will also want to tape off and cover any counter that is showing with old newspaper or painters' paper.


4.  Apply the adhesive.  Use the tile trowel to apply a thin layer of the adhesive to an area of the wall that you will be able to apply tile to in about thirty minutes or less.  Use the teeth on the trowel remove excess and even out the adhesive layer.

5.  Apply the tiles.  Starting at a bottom edge of a prominent focal point, apply the tile over the adhesive, pressing firmly but not hard.  Make sure you get the tile set exactly where you want it the first time, because once it has been set in the adhesive, it is VERY difficult to move.  It will not slide into place, even a minimal amount, if you put it on crooked.  Put spacers under where the tile will set (we put them on the counter ledge), and make sure you put spacers around the edges of the tile before you place the next tile or sheet.


**From this point you will go back and forth between applying the adhesive and placing tiles until you have placed them all.  Do not forget to add the tile spacers in between.  When you get to the edges, around outlets or any other you will need to make cuts with the wet saw or tile nippers, and you may find it easier to apply the adhesive directly to the back of the tile.  After all the tiles have been placed, you may remove all the tile spacers, but if you forget, they will come out easily before you apply the grout.

6.  Apply the grout.  After the tile has set for 24 - 48 hours (depending on the instructions on the adhesive), you may apply the grout.  Follow the directions to mix the powder grout or simply apply the premixed directly from the carton.  It may be easier to scoop the grout with a simple trowel from the carton onto the grout float.  Holding the grout float at a 45 degree angle,  press the grout into the space between the tiles (joints), moving diagonal to the lines, working from the edges toward the center.


7.  Wipe down grout with a damp sponge.  After the grout has set for ten minutes (this is ten minutes from the first grout has been placed, not ten minutes after you are done), dampen a sponge and wipe up the excess grout from the surface of the tiles.  Some would suggest having a bucket to hold water in, because you will need to rinse the sponge between every wipe so as not to simply push watery grout around on the tiles, but doing it in the kitchen meant I just rinsed the sponge in the sink so that I was not constantly changing the water in the bucket.  This is where having two people might come in handy, as AC was able to continue applying grout while I (and even SC) came behind him to remove the excess.  You do not want the sponge to be so wet it is dripping water, as this will add too much water to the grout in the joints.  It needs to be barely damp.

8.  At least four hours later, use a tile scrubber to remove any lingering grout residue.  This tile scrubber is simply a sponge that has a slightly abrasive side (like Grout Scrub Sponge With Coarse Scrub Side), and on the tile we chose, the only residue remained on the glass tiles.  So, I dampened the abrasive side of the sponge and scrubbed lightly until the residue was gone.  Then I wiped the excess water away with a clean towel.

9.  Caulk the edges.  After the grout has set 18 - 24 hours, apply caulking to the edges between the tile and counters, outlets, etc.  This is eminently easier with a caulking gun.

10.  Clean up and enjoy!  Reaffix outlet covers, push the stove back into place, and put the things that live on your countertop back where they go.


Overall, this was an easy project, though definitely a two (amateur) person job.  I love the way it turned out, and would love to encourage anyone who is thinking about giving it a try that you can do it.

What small upgrade projects are you planning?  Leave a comment, and then check out more Top Ten Tuesday posts here:

Top Ten Tuesday at Many Little Blessings

**This post contains affiliate links.  Please read my disclosure statement.

Sunday, December 2, 2012

Advent Day 1 & 2:
"The people who walk in darkness
Will see a great light ..."


"The people who walk in darkness
Will see a great light;
Those who live in a dark land,
The light will shine on them."

-Isaiah 9:2

Last year we began celebrating the coming of Christmas by using a traditional chocolate-behind-the-flap advent calendar, though it did have the story of Jesus' birth written on the back of the flap.  Each night before bed, AC or I would read all the previous flaps up to the new one, and then SC would get to eat the candy.  This year, however, I wanted to do something a little more.  I love that some of the advent calendars still print the Christmas story, but I really want SC to understand how big a deal Christmas is, and why Jesus being born is so important.

So, after some research (and noticing on a few blog sidebars), I found Truth in the Tinsel, an ebook by Amanda White.  We have only done two days so far, but I already love it.  It has simple crafts that are quick to complete while I read the Bible verse, and it gives some great hints as to how to talk about specific things with SC.  I am going focus on what we are talking about and working on each day, so look for our Advent 2012 posts every few days!

DAY 1: Light

For Day 1, we read from Isaiah and talked about how Jesus is the light come to overtake the darkness.  After reading the passage, I had to give a bit of backstory to remind SC of Genesis and the fall of man, and explain that Isaiah was a prophet and though he lived before Jesus was born, he was proclaiming that Jesus would come.

We made a cute light ornament from tissue paper and construction paper.


We also happened to have scented candles burning in the room, and SC requested we turn off all the lights so we could see what it was like to have the candle illuminate things instead.

DAY 2: Kingdom

For Day 2, we reread the passage from Isaiah, but this time we talked specifically about what it meant to be a king, who kings were, and how Jesus is the King of Kings.  Fittingly, we made a crown ornament.


Currently I have these two ornaments hanging on an as-of-yet undecorated tree, but I think I will move them to a spot under our long bar-height counter that faces out toward the living room so that we can look at them in order.  Also, for those who are worried my child is missing out, I did buy the chocolate advent calendar too and SC has been getting a candy after we complete the craft.

Do you have any family advent traditions?  Share them below!


**I am not an affiliate of Truth in the Tinsel, nor have I been asked to review it.  I am not being compensated in any way for using this product, including, but not limited to, receiving a free copy for review purposes.  Please read my disclosure statement to learn more about my affiliations.

"Life is either a daring adventure, or nothing."

"Life is either a daring adventure, or nothing."
Helen Keller, The Open Door

Some of you might have noticed that I have not posted in a little over a week, including that I missed What 2 Read Wednesday for November, and that when I did get a post up in the past month, it was either a Top Ten Tuesday list or a Thankful Thursday blurb.  Well, this past month has been fairly hectic for us as a family, and though I love blogging and am thankful that I have this outlet to publish my thoughts, ideas, photos and the like, the blog had to take a backseat to the rest of life.


Over the past month we have had the opportunity to tag along on two trips with AC, one planned and one not-so planned, as well as been able to spend time just enjoying AC being in town with family and friends for Thanksgiving.  Unfortunately, it took almost a week before leaving to get organized enough to get us all out the door on time and with all of our stuff, and took almost a week for us to recover for being gone and get everything back to normal; and then we did it all over again.  We also put in a small backsplash over Thanksgiving weekend, which I hope to post about on Tuesday with steps and pictures! 

We have NOT kept up with our homeschooling, even though I had planned for us to be able to work right up to leaving and then pick things up right away when we got back from said trips.  So, we have done maybe two days of WEEK 2, and we should be on WEEK 7ish.  AC is out of the country again, so we may be able to catch up a little, finishing WEEK 2 and WEEK 3 this week, but I am not stressing about it.  We have had a blast this last month, traveling to two new places, and with the way AC's job is, I hope there will be tag-along trips for us in the future, and the great thing about homeschooling is that it is adaptable.  I do need to figure out how to bring some of the things along with us (like math and handwriting, which really need to be done daily), but I am still figuring it out.

AC and I have made an important decision, however, about what we will do next fall when SC is officially eligible for kindergarten.  I had a long talk with her pre-k teacher about how she felt SC might do in pubic school, and we hashed out all the possible options.  She summed up her recommendations by saying "kids like [SC] just do not thrive in public school."  Well, thrive is exactly what I want for her.  After hearing that, and relaying everything she told me back to AC, we decided that for next year we will enroll her in the two-day-a-week kindergarten program that is offered by the mother's day out program that is doing her preschool, and to continue the homeschooling we have been doing (hah!) here at home.  This will also make it much easier if we get another opportunity to tag along with AC (like we are hoping to) as the amount of travel in the next year will be fairly similar to what it has been recently.  So, here we go, on our daring adventure!
Related Posts Plugin for WordPress, Blogger...